How to use a speaker cabinet IR to make your DI tone sound like a real amp
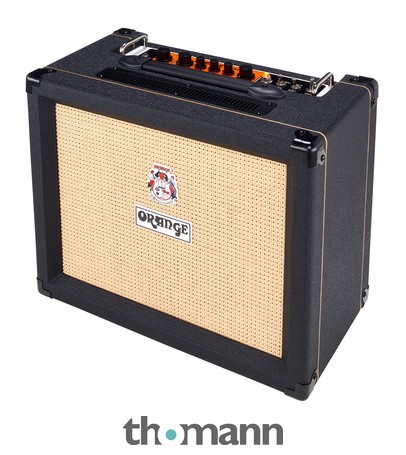
Right then. You've spent good money on an amp sim, you've dialled in what looks like a reasonable high-gain or blues tone on screen, you hit record — and it sounds like a wasp trapped in a biscuit tin. Flat, fizzy, no depth. The problem, nine times out of ten, isn't the amp model. It's the cabinet.
Impulse responses — IRs — are the bit most people skip past when they're starting out with DI recording. Which is a shame, because they're doing more heavy lifting in your recorded tone than almost anything else in the chain. Let me explain what they actually are, and more importantly, how to get them working properly.
What an impulse response actually is
A speaker cabinet IR is a mathematical snapshot of how a specific cabinet, loaded with a specific speaker, recorded with a specific microphone in a specific position, responds to sound. The capture process involves firing a test tone through the whole rig and recording the result. The software then inverts that to extract the cabinet's acoustic fingerprint.
When you load that IR into a plugin or a hardware unit and run your amp-sim signal through it, you're essentially playing through a convolution of your signal with that acoustic fingerprint. The cabinet's character — the low-end bloom, the top-end rolloff, the midrange honk — gets applied to your otherwise speaker-less, microphone-less DI tone.
Without an IR, or with a poor one, your amp sim sounds like it's going directly into a mixing desk. Because that's essentially what it's doing.
How to load an IR in your signal chain
Most amp sim plugins — Neural DSP, BIAS FX, Line 6 Helix Native, whatever you're running — have a cabinet block built in that accepts third-party IRs in WAV format. Usually 44.1kHz, 48kHz or 96kHz at 24-bit. The process is usually just: disable the built-in cabinet model, open the IR loader, drag in your WAV file.
If you're running a hardware unit like the HX Stomp or the Quad Cortex, the process is similar — you import the IR file via the manufacturer's desktop app and then assign it to the cabinet block in your preset. The Kemper works differently again (it captures whole amp-plus-cabinet rigs rather than IRs as such) but the principle holds.
Standalone IR loader plugins like Two Notes Wall of Sound or the free Catharsis by Ignite Amps also work well if your sim doesn't have an IR slot, or if you want to separate the amp and cabinet stages across two different plugins.
Where to find good IRs — and what to look for
There's no shortage of free IRs online. Celestion's site sells commercial captures of their own speakers in various cabinets, and they're very good — these are measured in proper studio conditions and the files are clean. Ownhammer has been at this for years and their libraries are extensive. Glenn Fricker's free IR pack (from Spectre Sound Studios) is widely used in heavier genres and holds up well.
For blues and classic rock tones — which is where I live — I've had good results with captures of 4x12 cabs loaded with Celestion Vintage 30s and G12H-30s, often paired with a Shure SM57 at the cap edge. That combination is what you're hearing on a huge proportion of British rock records. A 1x12 open-back capture with an Alnico Blue, close-miked with a ribbon, is the AC30 territory.
Pay attention to the microphone position in the IR description. Cap-edge (mic pointing at where the dust cap meets the cone) tends to be brighter and more aggressive. Off-axis or pull-back positions are warmer and more complex. Most IR packs include several positions — don't just grab the first one, spend twenty minutes A/B-ing them. The difference between a cap-edge and a 3-inch-pull-back capture of the same speaker can be dramatic.
The most common mistake: too much gain before the IR
I spent a decade on the bench repairing real amps and I can tell you that the fizz people complain about in DI recordings is almost always a gain problem, not an IR problem. A real cranked amp has natural compression and sag in the power section — the EL34s or 6L6s are working hard, the output transformer is saturating slightly, the speaker is moving air and distorting itself in a musical way. None of that happens in a sim.
What you're left with is a very clean, very honest clipping circuit. Which means every extra notch of gain on the preamp model is translating directly into the IR with full fidelity. Turn it down. Then turn it down some more. If you're used to running a real amp and you'd have the gain at 7, try 4 or 5 in the sim. Use a drive pedal in the chain before the amp model if you want more saturation — a Tube Screamer (check price) into the amp input, same as you would with a real amp, pushes the sim into the right frequency range and compresses the front end more naturally.
Honestly, the biggest single improvement most people will make to their DI tone is backing the gain off. It's not a criticism of the sims — it's just a different beast to a real power stage.
EQ before and after the IR
IRs aren't magic. A badly EQ'd signal going into one will come out badly EQ'd. Most amp sims let you put a high-pass filter before the cabinet block — use it. Roll off everything below 80Hz, sometimes 100Hz. Low-end mush below that range serves no purpose in a guitar track and will make the IR sound undefined and muddy.
After the IR, a gentle high-cut around 8–10kHz can smooth off any harshness — real cabinets naturally roll off up top, and even good IR captures can retain more top-end energy than you want. A narrow parametric dip somewhere between 2kHz and 4kHz often helps if your tone feels nasal or honky.
That said, don't just reach for corrective EQ as a reflex. Try a different IR position first. Sometimes moving from cap-edge to slightly off-axis gives you exactly what you were trying to EQ in, without the phase weirdness that multiple EQ moves introduce.
Latency and monitoring — a word
If you're tracking in real time with an IR loader plugin, your audio interface's buffer setting becomes very important. IRs are computationally light compared to full amp sims, but if you're running everything — amp model, IR, maybe a reverb — through a single plugin chain at a 256-sample buffer, you'll feel that latency while playing. Get your buffer down to 64 or 128 samples when tracking, and accept that your CPU will work harder for it. Freeze tracks when you're not actively playing them if your machine starts complaining.
Some hardware options like the Yamaha THR10II (check price) do the cabinet simulation onboard with near-zero latency, which sidesteps this entirely for home recording — worth knowing if you'd rather not manage it in software.
For anyone still weighing up whether to go the real-amp route or lean into sims for home use, our look at the best practice amps covers the other side of that decision, and there's more on getting DI basics sorted in our guide to recording direct with good tone.
Getting IRs right isn't complicated, but it does take a bit of patience with the variables. Spend the time on it. The difference between a stock cabinet sim and a well-chosen, well-positioned IR through a properly gain-staged amp model is genuinely striking — and once you hear it, you won't go back to letting the plugin make those decisions for you.
— Jez, Amps & Valve Tone Editor
Common questions
- Do I need a paid IR pack or are free ones good enough?
- Plenty of free IRs are genuinely excellent — Glenn Fricker's Spectre Sound pack and various Ownhammer free tiers are widely used by working engineers. Paid packs from Celestion and Ownhammer go deeper on microphone position variety and speaker combinations, which is useful if you're after something specific. Start with free options and buy when you know what you're missing.
- What sample rate should my IR files be?
- Most IR loaders accept 44.1kHz and 48kHz WAV files, and that's what the majority of packs ship at. If you're recording at 96kHz you'll want 96kHz IR files to match — using a lower-rate IR at a higher sample rate can introduce subtle artefacts. Check what your IR loader supports and match your session sample rate.
- Can I use an IR loader with a real amp?
- Yes — this is how a lot of people run live without carrying a cabinet. You'd use a load box (like the Two Notes Torpedo series or the Universal Audio OX) between your amp's speaker output and the IR loader, which lets the amp work into a proper load while you take a line-level signal into the IR. You get real power-stage saturation and sag with the cabinet simulation happening in software or in the load box itself.
- Why does my IR sound boxy or honky even with the gain turned down?
- A narrow peak somewhere in the upper midrange — often between 2kHz and 4kHz — is the most common cause of boxiness. Try a narrow parametric cut of 2–4dB in that range and sweep it slowly until the honk reduces. Also try a different mic position in the same IR pack; a slightly off-axis or pulled-back capture of the same speaker can sound considerably more open.
Right then — I'm Jez, and I've spent the best part of 25 years chasing the same thing: a cranked British valve amp on the edge of breakup. Cut my teeth in smoky blues clubs around the North West, then spent a decade on the bench fixing other people's amps, which taught me more about tone than any pedal ever did. I'm a sucker for an EL34 power section and a bit of natural sag. I'll always tell you straight whether an amp's worth the money or whether you're paying for a badge.
Gigging blues-rock guitarist (25+ yrs) and former valve-amp tech
More from Jez
 How to use fuzz as a lead tone: dialling in sustain without losing definitionFuzz pedals aren't just for rhythm mayhem. Jez explains how to shape a fuzz lead tone that sings without turning to mush.
- How your amp's clean channel affects your overdrive pedal toneYour overdrive pedal doesn't work in isolation — the amp behind it shapes everything. Jez explains what the clean channel actually does to your dirt tone.
- Why your electric guitar goes out of tune when you bend stringsBends going sharp and not returning to pitch? Jez explains the real causes — nut slots, string trees, saddle friction — and how to sort them.
- Guitar pickup magnets explained: alnico vs ceramic and what they do to your toneAlnico or ceramic — the magnet inside your pickup shapes your tone more than most players realise. Jez breaks down what the science actually means for real playing.
- Guitar pickup wiring: what series, parallel and coil-split actually do to your toneSeries, parallel, coil-split — three wiring options on the same pickup, three completely different sounds. Jez breaks down what's actually happening inside the circuit.
- How volume knob technique changes the way your amp behavesRolling your guitar's volume knob isn't just about getting quieter. It's one of the most powerful tone controls on your whole rig — here's why.